This is a free crochet pattern and video tutorial showing how to crochet a quick flower applique that’s perfect for scraps. Pull your favorite weight yarn and yarn colors from your stash to create a field of flowers in whatever project you choose to do. From sewing thread all the way up to jumbo weight yarn, there are endless possibilities!
This post contains affiliate links for Amazon, Etsy, Lion Brand and WeCrochet. If you make a purchase by clicking on them, I make a small commission at no extra cost to you. Thanks for your support!
Find the free crochet pattern instructions below, or purchase a printer-friendly, ad-free PDF on Ravelry by clicking here.
In a hurry? Pin this for later when you have more time.

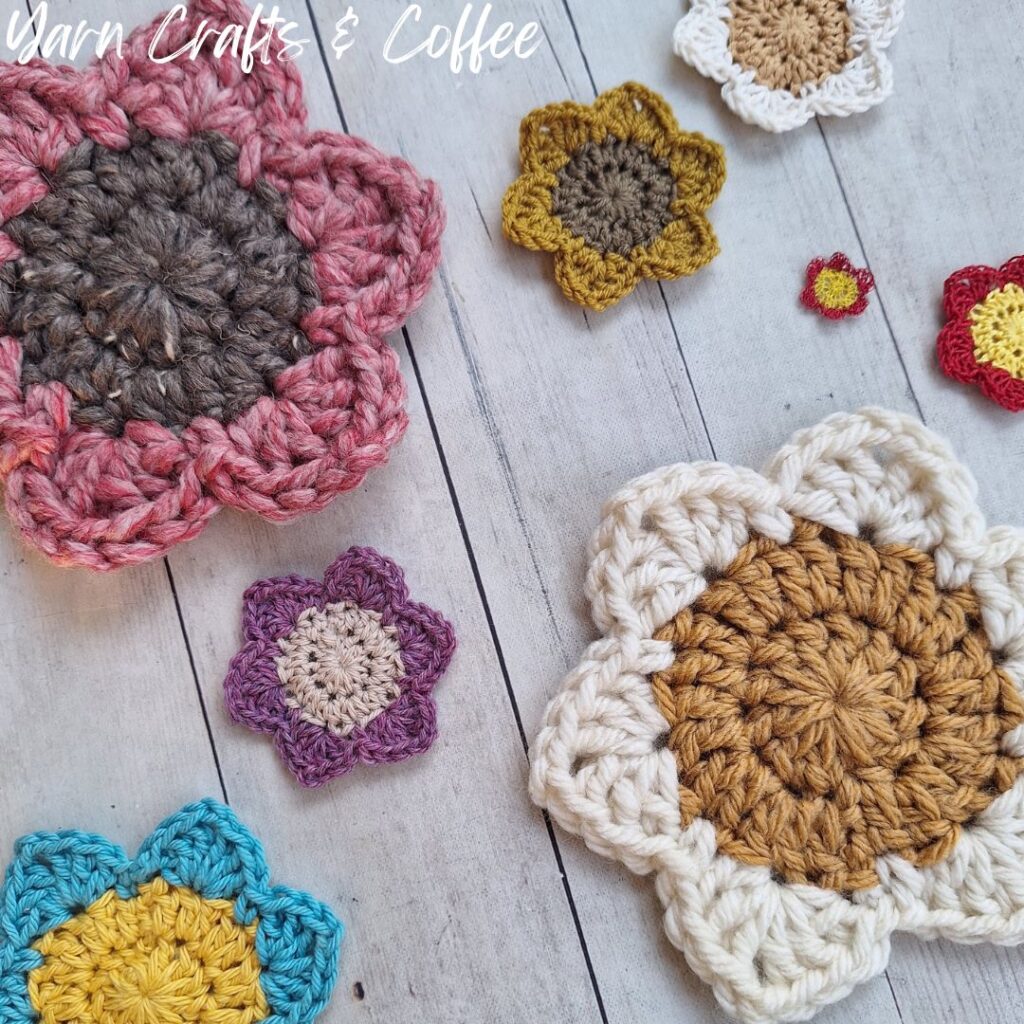
One of the fun things I love to do with crocheted appliques is work up the same pattern in different weight yarns (and even hook sizes) to see what sizing I can get, and then see how the applique could be used.
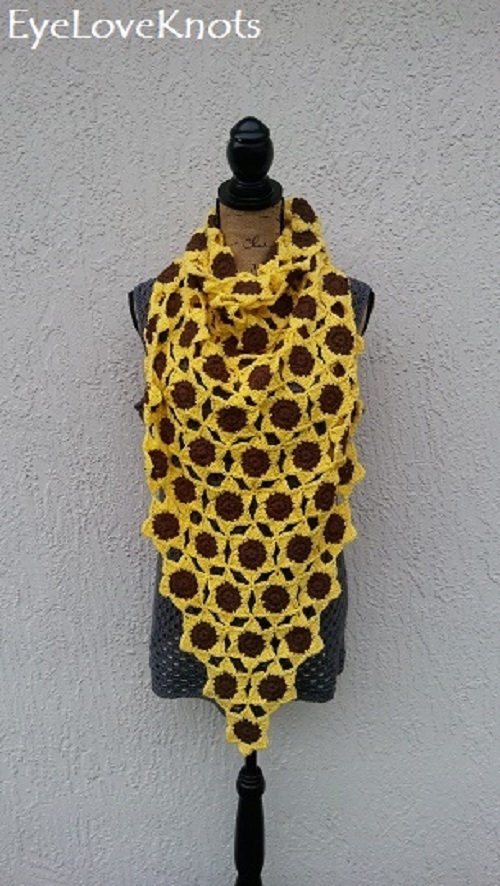
When it comes to this cute little crocheted flower, it’s all I can think about in the Spring! And while I lean towards yellow center and white petals to make Daisies, with a brown center and yellow petals, you can get a Sunflower for Summer and Fall. I’ve always experimented with many other color combinations, traditional or not, have fun experimenting with your color choices! The possibilities are truly endless!
There are two versions of this flower. One version has a half double crochet center, and the other version has a double crochet center. Depending on the project you’ll make with the flower, you may want to use double crochets for a slightly larger size, such as with coasters where you want a little more room for your mug, but my favorite is the half double crochet version because I think the proportions are a little bit better – completely up to you!
WHAT CAN I MAKE WITH A CROCHETED APPLIQUE?
There are so many possibilities for crocheted appliques, here are a few of my ideas:
Make several and string up to make a garland for wall decor, mantel, entryway table, etc, or hang as an ornament. You may need to starch the flowers to get them to lay flat.
Use them as an applique to sew onto a scarf, afghan, throw pillow, tote bag, etc.
Make several, and glue onto a wreath base or to the front of a card.
Glue to an alligator clip for a cute hair accessory.
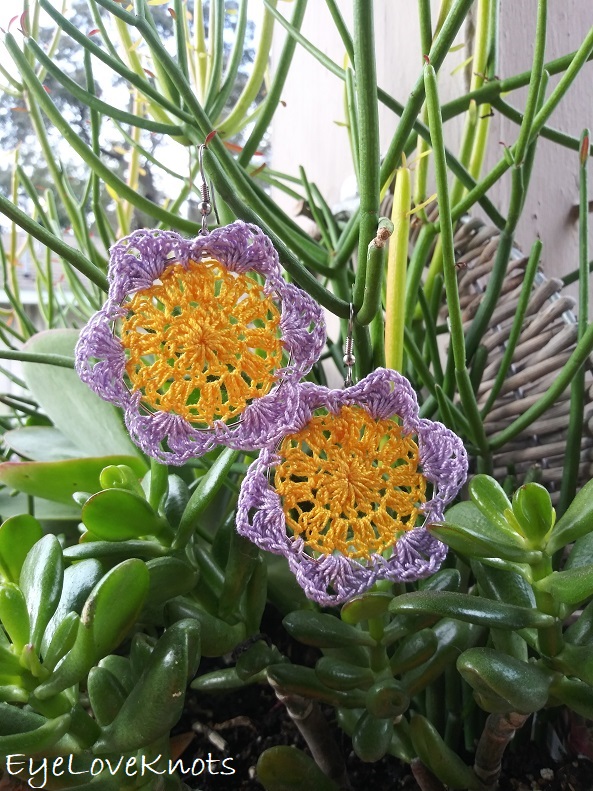
Worked in sewing thread or #10 cotton thread, use the flowers for jewelry, like I did for my Delilah Hoop Earrings. You can experiment with the weight of the yarn to make larger flowers for necklace pendants too!
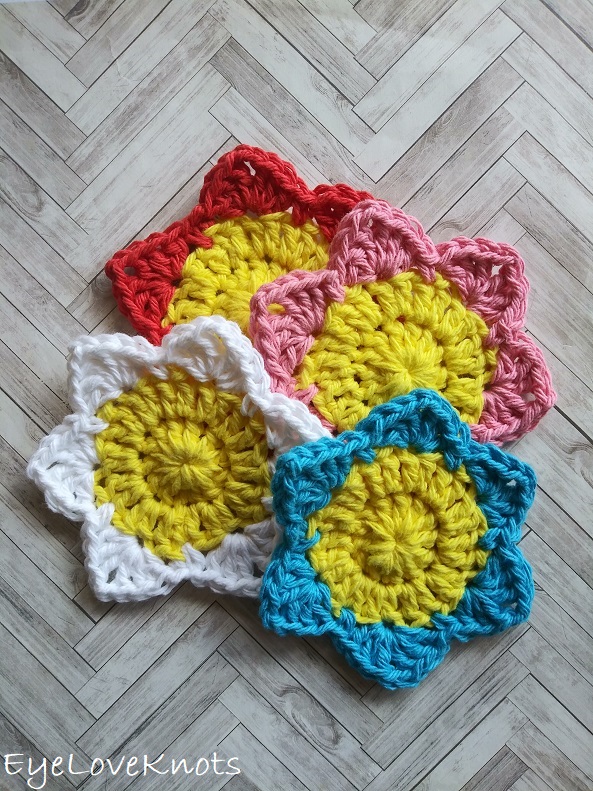
Work in 100% cotton yarn to use as coasters, like I did in my Delilah Coasters, or as large facial scrubbies – cotton yarn is great for exfoliating!
Join-as-you-go to make bigger projects, like these other free crochet patterns in the Delilah Series:
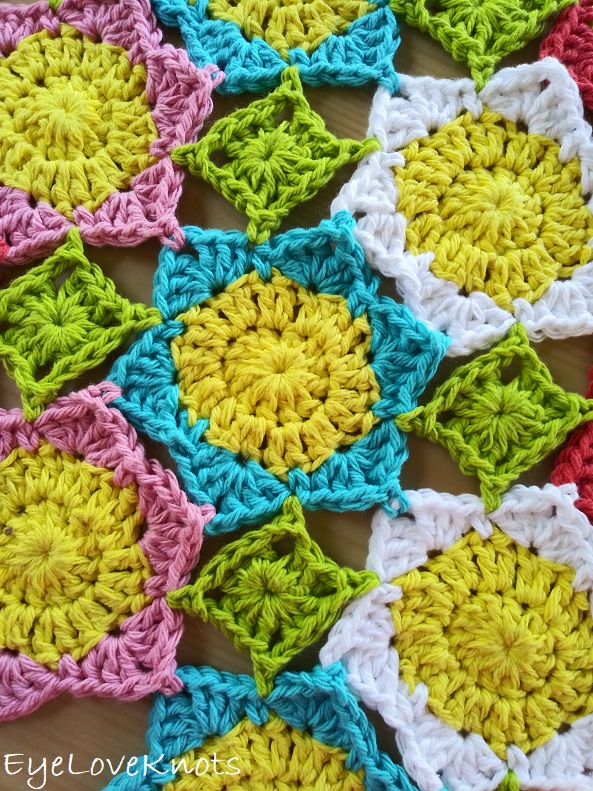
Delilah Table Runner & Delilah Wall Hanging
Spring Fling Crochet Event 2025
I’m hosting the Spring Fling Crochet Event from April 16th, 2025 through April 22nd, 2025, in which I’m sharing 7 crochet flower idea crocheted with this easy crochet floral motif, and you can add each one to your Ravelry library for free as well (see the Ad-Free, Printed Friendly PDF section below). Make sure to check out the schedule and check out the supply list for the event.
Ad-Free, Printer Friendly PDF:

Yarn Crafts & Coffee newsletter subscribers get access to Exclusive Subscriber Content, like the free PDF of this pattern via the Free File Library. The library is password protected so sign up for my newsletter and you’ll receive a Welcome email containing this month’s password, or if you are already a blog subscriber, reference your latest newsletter for this month’s password. From the library, you’ll be able to access the PDFs via Google Drive – you do not need to have a Google Drive account to view and download the PDF.
For a Limited Time…
Through 04/22/25 at 9:00am EST, you can grab a free copy of the PDF for the Delilah Applique on Ravelry using code FLOWERS25. I earn my income from the number of pageviews my blog sees, so please do not share the code, but instead share the link to this post so others can find it. Thank you!
After 04/22/25 or for non-subscribers, if you would like a PDF version of this post, you may get one through either my Etsy Shop or Ravelry Shop for a small fee. This fee is to compensate for the views lost when you no longer need to return to the blog to for the information, as you will have your own copy.
In a hurry? Pin this for later when you have more time!


Materials:
- 12 Yards Total of Yarn – 6 Yards for the Flower Center and 6 Yards for the Petals – & Respective Crochet Hook
- Sewing Thread & 0.75mm Hook – I used Gütermann Embroidery Thread in the 4565 [Red] and 850 [Yellow] colorways
- #10 Cotton Thread & 2.35mm Hook – I used Circulo Clea 125 in the Gouda and Carmine colorways
- Fingering Weight #1 Yarn & D/3.25mm Hook – I used Berroco Vintage Sock in the Mushroom and Fuschia colorways
- Lightweight #3 Yarn & F/3.75mm Hook – I used Berroco Modern Cotton DK in the Del and Sandy Point colorways for one flower and Lion Brand Superwash Merino in the Olive Branch and Mustard Seed colorways for the other
- Worsted Weight #4 Yarn & H8/5mm Hook – I used WeCrochet Dishie in the Honeybee and Azure colorways
- Chunky #5 Yarn & L11/8mm Hook – I used Lion Brand Hue & Me in the Mustard and Salt colorways
- Super Bulky #6 Yarn & M13/9mm – I used Lion Brand Wool Ease Thick & Quick in the Barley and Potion colorways
- Tapestry Needle
Material Notes:
You will notice that even though I used the same #3 weight yarn and hook size that my measurements varied between the two flowers. You can get slightly different results with different yarns, or even change the sizes slightly by going up or down a hook size so have fun experimenting with yarns and hooks in your stash!
Jewelry Pliers are an excellent tool to use to help weave in ends on tougher yarns, like cotton and chunky stuff as it can be quite tough on the fingers when weaving in with just fingers and a tapestry needle.
Another great tool, especially when working with tough and/or chunky yarns is a bent tip tapestry needle. I like this silver set from WeCrochet, but Amazon also has a lot of cute, colorful options.
Time Spent:
Just over 15 minutes

Measurements:
- All Flowers but Worsted Weight Version have been made with a HDC center.
- Taken from the position of one petal at the top and bottom centers, tip of top petal to tip of bottom petal by width:
- Sewing Thread Flower: 3/4″ by 3/4″
- #10 Cotton Thread: 1 7/8″ by 1 3/4″
- Fingering Weight: 2 5/8″ by 2 1/4″
- Lightweight, Modern Cotton DK: 2 7/8″ by 2 1/2″
- Lightweight, Superwash Merino: 2 5/8″ by 2 3/8″
- Worsted Weight: 4 1/8″ by 3 1/2″
- Chunky: 6 1/2″ by 5 3/4″
- Super Bulky: 6 5/8″ by 5 3/4″
You will notice that even though I used the same #3 weight yarn and hook size that my measurements varied between the two flowers. You can get slightly different results with different yarns, or even change the sizes slightly by going up or down a hook size.
Overall, you’ll just want to keep in mind the finished use for the flower. If you’re making something like a blanket, the gauge and measurement is not essential just as long as all of the flowers are the same size, whereas if you’re making a top, gauge would be essential so you’d want to measure a little more closely. If you were sewing them onto a project, you would just want them to fit comfortably, which may involve using a lighter weight yarn then the rest of the project.
Abbreviations (US Terms):
- DC – Double Crochet (Photo Tutorial)
- SC – Single Crochet (Photo Tutorial)
- HDC – Half Double Crochet (Photo Tutorial)
Pattern Notes:

I work my increases a little different than most, and that is that the first stitch from the first set of increases is done in the first stitch of the round, which will appear just to left of the beginning chain, then the round will be worked as normal, and the final stitch of the round will be the second stitch of the first set of increases, and it will be worked into the same stitch as the first, and appear just to the right of the beginning chain. Check out my photo tutorial here: How to Keep a Straight Seam.
Though there are only three rounds in the flower, and a straight seam isn’t really an issue, this is my preferred method – you can work in your preferred increase method for the center as long as you end up with 24 stitches.
How I worked my yarn color change: after joining, pull the new color through the loop on your hook. Then, pull the original color tight and it will disappear. If it pops up as you work, just tug on the tail end of the original color again, and it will disappear. You will secure it down in place when you weave in your ends.

You can also work in the more traditional ways of pulling new color through in the last yarn over of the previous stitch (photo tutorial here: How to Change Yarn Colors in Crochet) or fastening off the center color, and rejoining the new color in any stitch, but I find the way I did it much easier, and it hides the color change.
I did use a tapestry needle to weave in my ends, but you can also weave in your ends using a small crochet hook, like a G6/4.25mm – I have a video tutorial showing how. Another way you can join yarn and weave in ends when working with wool yarns is felting, and All About Ami has a great video showing how to do it and photo tutorial.

crochet flower applique Video Tutorial:
Delilah Applique Written Crochet Pattern:
HDC Version:
In Center Color, chain 5. Slip stitch to the first chain to form a ring. Chain 1 (does not count as a stitch here or throughout). Work 12 HDC into the ring. Join. (12 HDC)
R2: Chain 1. HDC into the 1st HDC, 2 HDC into each of the next 11 HDC, HDC into the same HDC as the 1st. Join with Petal Color, and fasten off Center Color. (24 HDC)
R3: In Petal Color, chain 1. SC into the 1st stitch, skip the next stitch, (3 DC, chain 2, 3 DC) into the next stitch, skip the next stitch, [SC into the next stitch, skip the next stitch, (3 DC, chain 2, 3 DC) into the next stitch, skip the next stitch] 5x. (6 Petals, 6 SC)
Fasten off, and weave in ends. Block if desired – I did not.

DC Version:
In Center Color, chain 5. Slip stitch to the first chain to form a ring. Chain 1 (does not count as a stitch here or throughout). Work 12 DC into the ring. Join. (12 DC)
R2: Chain 2 (does not count as a stitch). DC into the 1st DC, 2 DC into each of the next 11 DC, DC into the same DC as the 1st. Join with Petal Color, and fasten off Center Color. (24 DC)
R3: In Petal Color, chain 1. SC into the 1st stitch, skip the next stitch, (3 DC, chain 2, 3 DC) into the next stitch, skip the next stitch, [SC into the next stitch, skip the next stitch, (3 DC, chain 2, 3 DC) into the next stitch, skip the next stitch] 5x. (6 Petals, 6 SC)
Fasten off, and weave in ends. Block if desired – I did not.
Please feel free to make and sell your own items made using this pattern, but keep in mind, this written pattern and my photos are protected by copyright. Please DO NOT claim this pattern as your own nor should you sell my pattern. DO NOT re-publish my photos as your own. DO NOT copy and paste my pattern anywhere, link to it instead so other’s can visit. Making videos providing instructions how to make my projects on any social media platform is also not permitted.

Join one of our awesome Facebook groups to share your creations, and see what others are up to!
– Yarn Crafts & Coffee Community
– DIY Home On Rockwood Lane