This complete crochet guide goes over everything you need to know about how to crochet an ear warmer, including answers to what size should a crocheted earwarmer be and what is the best yarn to use for a crocheted ear warmer, as well as free ear warmer and headband crochet patterns.
This post contains affiliate links for WeCrochet. If you make a purchase by clicking on them, I make a small commission at no extra cost to you. Thanks for your support!
In a hurry? Pin this for later when you have more time.

Because I love having my hair up in a bun, my go-to cold weather accessory is an ear warmer since they are open on the top. I also live in Florida where it’s still warmer than other places in the Winter, and sometimes, an ear warmer over the ears is really all that’s needed, or pairs perfectly with a hoodie.
I’ve designed over 15 earwarmer crochet patterns, most of which you can find on my EyeLoveKnots blog and others on my Cre8tion Crochet blog. I always like to include an FAQ section with useful details on crocheted ear warmers, like how big they be should and what the best yarn for them is, but I’ve decided to create this separate post with that information so I could build on this awesome crochet resource without making my posts too lengthy. In this complete crochet guide, I will share with you some tips for crocheting ear warmers, answer all of your questions about crocheting earwarmers and share some free ear warmer crochet patterns with you. If you have a question that you don’t see answered, please feel free to drop me a comment below and I will add the information.
You Might Also Like:
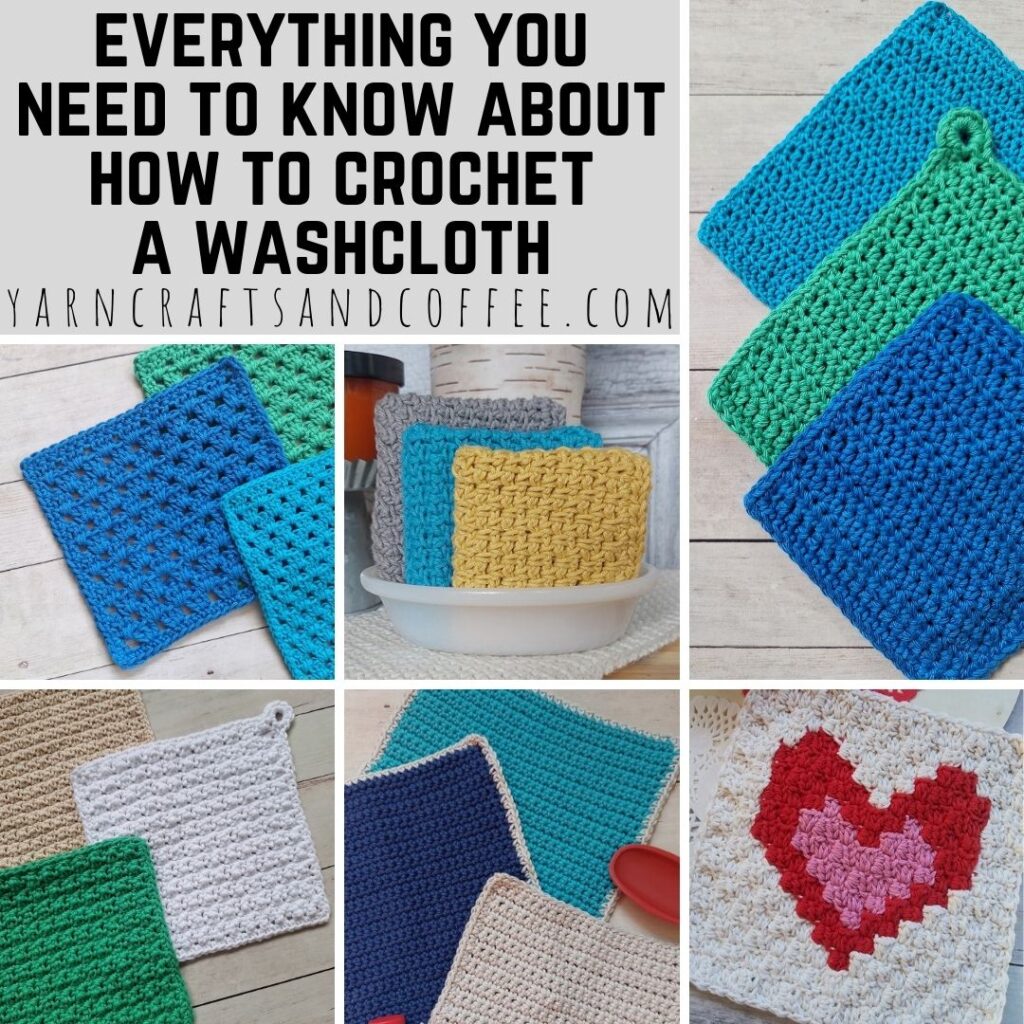
Everything You Need to Know About How to Crochet a Washcloth
Is it Ear Warmer or Earwarmer?
In search, you will find many patterns listed as both two words, ear warmer, and one word, earwarmer. I personally like to use earwarmer (one word), but I see more patterns and articles using ear warmer (two words) plus my spell check marks it in one word as an error.
Is a Headband and an Ear Warmer the Same Thing?
An ear warmer and a headband both describe a tubular accessory that fits over your head and sits at about forehead level, but they are different even though they both could be used to keep your ears warm.
An ear warmer comes down around your forehead, is made of a thicker fabric and used to protect your ears from cold weather and winds.
A headband can be used around your forehead or worn on top of your head in your hair and while it could be used to keep your ears warm, it’s usually worn decoratively or to keep your hair out of your eyes and face. Headbands come in many different thicknesses from a very thin elastic band to a thick fabric or elastic band (and materials too including a crown-like band).
Is it Necessary to Crochet a Gauge Swatch Before Starting a Crocheted ear warmer?
Whether you need to crochet a gauge swatch before starting to crochet an ear warmer depends on how the ear warmer will be worked.
If working in the round, which is worked to fit around the head and then each row builds the height, then I would recommend working a gauge swatch prior to beginning just in case your gauge doesn’t match up so you don’t have to frog as many stitches before retrying. Take note that checking gauge for an in the round project may have you work up a smaller version of the ear warmer versus a flat swatch, and this is important to follow as the stitches can behave differently based on the method chosen.
If working in rows, which is worked heightwise and then each row builds the length to fit the head circumference, then you can easily start working in the pattern first and measure after you work up several rows to ensure the measurements are on point. Working in rows is much more forgiving, and while measuring is essential, meeting gauge is not. Basically, you would measure how tall the ear warmer is and make sure that is a height you’re comfortable with (taking into consideration if a border will be added), and then you can continue to work repeats until you’ve reached an appropriate length to fit your head circumference.

How to crochet an Ear warmer | How to Crochet a Headband:
You can work an ear warmer in rows or in the round, and there are so many fun ways to finish an ear warmer depending on the technique you prefer and the shape you’d like to make.
I’m going to briefly discuss how to crochet a simple earwarmer worked in rows as well as in the round, but if you would like to know more about using different techniques, feel free to comment below to let me know, and I will add more details about them.

How to Crochet an Ear Warmer in Rows:
The majority of ear warmers crocheted in rows, are worked height wise to create the height of the ear warmer that will cover your ears by the length that will fit your head circumference. This is the easiest method for crocheting an earwarmer, and this is the method I will describe. Some crocheted earwarmers are worked in rows lengthwise, similar to working in the round, but this method requires taking a gauge before beginning or the possibility of having to frog many stitches to rework.
You’ll start with a chain that is the multiple of your crochet stitch pattern.
I will give some examples, but before I do, keep in mind that if you want to add a border to the top and bottom of the ear warmer, that it will add to how tall the finished ear warmer will be so you may want to take that into consideration when deciding on a width – I typically don’t add a border to mine.
More simple crochet stitch patterns like single crochet, half double crochet and double crochet, do not have a stitch multiple. This means that you can crochet any number of chains, work into the crochet chain as necessary for your stitch pattern [ie into the 2nd chain for single crochet, 3rd for half double crochet and 4th for double crochet], and then continue crocheting evenly all the way across.
For a more complex crochet stitch pattern like a staggered bobble stitch pattern, you’ll want to start with a stitch multiple that works for your pattern plus a turning chain. Using the same example, you would start with a chain that is a multiple of 4 + 5 + 1 – that means a number that is evenly divisible by 4 (which is the number of stitches in the repeat) like 8, 12, 16 etc plus 5 (for the stitches on the ends that are not included in the repeat), respectively that would be, 13, 17, 21, etc plus 1 for the turning chain.
After you work your beginning chain, begin crocheting down the chain in pattern all the way to the end of the row.
For the next row and all the remaining rows, you will start with a beginning chain, which may or may not count as a stitch depending on your stitch pattern, turn your work and then work across in your desired stitch pattern.
After working about 8 rows if you’re using a sport weight yarn or about 6 rows if you’re using a worsted weight yarn (more rows if you’re using a lighter weight yarn), you can measure the width, if you’ll be adding to the top and bottom of the finished ear warmer then add in the measurement for that now, and then you will know if the finished size will be as tall as you’d like it to be to cover your ears and fit how you like it to. I often find that in working with sport weight yarn, single crochets on the top and bottom adds about 3/8″ to the total height and in working with worsted weight yarn, single crochet adds about 1/2″ to the total height.
For Toddler, the height of a crocheted ear warmer should be about 3 3/8″ – 3 1/2″, and for Child, Adult Small and Adult Large, it should be about 3 7/8″ – 4″. Note: a headband would typically be much thinner.
Continue crocheting rows until you have reached the length needed to fit your head circumference. Overall, you want your finished crocheted ear warmer to be about 2″ – 2 1/2″ smaller than your head circumference. This can vary depending on your yarn choice and the fit you like best (ie comfortable but loose fit or for it to fit like a hug). Because the fit is essential here, you must measure the length out to ensure it is correct. If it’s too short, add more repeats, and if it’s too long, remove some repeats.
Keep in mind, you’ll want to finish on a row that makes sense for your stitch pattern. For example, in half double crochet when joined like a tube, I would finish on a wrong side row so when joined, the pattern would continue repeating with a right side row and then a wrong side row. If joining with a twist, the row you finish on may not be essential as it may not be seen.

What is the best way to join the ends of my crocheted earwarmer?
There is no one, best way to join the ends of a crocheted ear warmer – this depends on your preference and the look and style you’re interested in. My two favorite techniques for joining the ends of an ear warmer is by adding in a twist before whipstitch closed or by using the pull loop through join to crochet my final row and join to my first row at the same time, but depending on the stitch pattern and the style of the ear warmer, sometimes I use other methods, such as the mattress stitch.

How to Crochet an Ear Warmer in the Round:
Crocheting an ear warmer in the round creates the length of the ear warmer that will fit your head circumference by the height that will cover your ears. I do enjoy this method, especially since an ear warmer can be worked up in just a few rounds versus many rows, but this method requires taking a gauge before starting or the potential to work up several rounds and then have to frog it all because the size is not correct. Sometimes even with taking gauge, I still end up frogging and reworking.
There are two starting options here:
1. You can start with a chain that is the multiple of your crochet stitch pattern.
More simple crochet stitch patterns like single crochet, half double crochet and double crochet, do not have a stitch multiple. This means that you can crochet any number of chains, work into the crochet chain as necessary for your stitch pattern [ie into the 2nd chain for single crochet, 3rd for half double crochet and 4th for double crochet], and then continue crocheting evenly all the way across.
For a more complex crochet stitch pattern like a staggered bobble stitch pattern, you’ll want to start with a stitch multiple that works for your pattern. Using the same example, you would start with a chain that is a multiple of 6 – that means a number that is evenly divisible by 6 (which is the number of stitches in the repeat) like 12, 18, 24, 32, etc. The stitch pattern will come out evenly so you do not need to account for a turning chain when working in the round.
After you work your beginning chain, begin crocheting down the chain in pattern all the way to the end of the row.
2. You can start with a foundation single crochet, foundation half double crochet or foundation double crochet that is the multiple of your stitch pattern. Foundation stitches are recommended for projects that need more stretch width wise as a beginning chain can limit the amount of stretch on a finished project, and here we don’t want that earwarmer to feel too tight or restrictive. A foundation stitch is equal to the beginning chain and round 1. I typically work mine in a stitch that goes with the rest of my pattern so it all matches.
Following the same example above:
More simple crochet stitch patterns like single crochet, half double crochet and double crochet, do not have a stitch multiple. This means that you can crochet any number of foundation stitches.
For a more complex crochet stitch pattern like a staggered bobble stitch pattern, you’ll want to start with a stitch multiple equal to the repeat in your pattern because the pattern will seamless work all the way around. In this example, you would start with a number of foundation single crochets that is a multiple of 6 – that means a number that is evenly divisible by 6 (which is the number of stitches in the repeat) like 12, 18, 24, 32, etc.
At the end of the round, you will slip stitch join to the first stitch. The very bottom where the beginning tail end is will have a small gap and you’ll need to sew that up at the end so you may want to leave a slightly longer tail than normal to use for sewing.
For the next round and all the remaining rounds, you will start with a beginning chain, which may or may not count as a stitch depending on your stitch pattern, turn your work if desired or as directed by the pattern, then work in your desired stitch pattern joining at the end of the round.
After working about 8 rows if you’re using a sport weight yarn or about 6 rows if you’re using a worsted weight yarn (more rows if you’re using a lighter weight yarn), you can measure the width. Multiple this measurement by 2, since there is a front and a back, and then you will know if the finished size will be the size needed to fit your head circumference. Overall, you want your finished crocheted ear warmer to be about 2″ – 2 1/2″ smaller than your head circumference. This can vary depending on your yarn choice and the fit you like best (ie comfortable but loose fit or for it to fit like a hug). Because the fit is essential here, you must measure the width to ensure it is correct. If it’s too small, you need to go up a crochet hook size or adjust the number of stitches in the beginning, and if it’s too big, you need to go down a crochet hook size or adjust the number of stitches in the beginning.
Continue crocheting rounds until you have reached the height you’d like it to be to cover your ears. If you aren’t sure if it’s tall enough, you can try on the earwarmer before fastening off.
For Toddler, the height of a crocheted ear warmer should be about 3 3/8″ – 3 1/2″, and for Child, Adult Small and Adult Large, it should be about 3 7/8″ – 4″. Note: a headband would typically be much thinner.
Something to keep in mind as you approach this point: You’ll want to finish on a row that makes sense for your stitch pattern – not only within your stitch pattern, like starting with a round of single crochet and ending with a round of single crochet with staggered bobble stitch rounds in between, but also something like if you’ve been turning your rounds with round 1 being the right side of the fabric and you want symmetry, then you’ll want to finish with a round worked on the right side.

When Should You Wear an Ear Warmer?
Because I love having my hair up in a bun, my go-to cold weather accessory is an ear warmer since they are open on the top. I also live in Florida where it’s still warmer than other places in the Winter, and sometimes, an ear warmer over the ears is really all that’s needed, or pairs perfectly with a hoodie.
When I am in colder weather or windy weather, I wear an ear warmer, a messy bun beanie (which is open at the top) and then my hoodie (and usually my Ribbed Granny Stitch Cowl). I find that a beanie alone doesn’t keep my ears cozy enough.
What is the Best Crochet Stitch for an ear warmer?
Because the purpose of an ear warmer is to keep your ears warm and cozy, the best crochet stitches for an ear warmer are going to be any of them that produce a more solid fabric. Lacy stitch patterns, such as the granny stitch or v-stitches, are going to be more decorative like a headband, unless a second, solid layer it added underneath.

My favorite ear warmer that I use pretty much exclusively, even though I have so many I really love, is the Little Pebbles Earwarmer which uses a modified version of the even berry stitch in which I alternate because single crochets and treble crochets to create a fun texture.

I also really love the Twisted Through the Window Earwarmer, which uses inset mosaic crochet. It’s both cute and cozy.
How do you Measure Your Head for a Crocheted Ear Warmer?
Take a soft tape measure and measure your head circumference, or the distance around your head, just above your eyebrows.
What Size Should a Crocheted Ear Warmer Be?
You can easily adjust the height of an ear warmer if you prefer a thinner or thicker band, but average heights are:
For Toddler, the height of a crocheted ear warmer should be about 3 3/8″ – 3 1/2″.
For Child, Adult Small and Adult Large, it should be about 3 7/8″ – 4″.
Overall, you want your finished crocheted ear warmer to be about 2″ – 2 1/2″ smaller than your head circumference. This can vary depending on your yarn choice and the fit you like best (ie comfortable but loose fit or for it to fit like a hug).
For Toddler, the finished size of a crocheted ear warmer should be 17″ – 17 3/8″ to fit a head size of 18″ – 20″
For Child & Adult Small it should be 19″ – 19 3/8″ to fit a head size of 20″ – 22″
For Adult Large it should be 20 1/2″ – 20 3/4″ to fit a head size of 22″ – 23″
Can You Wash a Crocheted Ear Warmer?
Hand washing is always the best way to preserve your crocheted projects, but I do like the ease of machine washing and drying. Typically I use yarns that I are machine friendly, like Lion Brand Wool Ease. I machine wash in cold water on the gentle cycle, and then machine dry on low heat and lay flat to dry the remainder.

What is the Best Yarn to Use to Crochet an Ear Warmer?
There are many yarns that would be perfect for ear warmers! The first question I would start with is will it be for warm weather or cold weather? A cotton blend yarn like Berroco Modern Cotton would be perfect for late Spring into early Fall, and a wool blend yarn like Lion Brand Wool Ease would be perfect for chilly morning runs or nights out and Winter time.
If choosing a cotton yarn, make sure to choose a blend and not a 100% cotton. Cotton needs a secondary fiber within it to help it keep it’s shape and bounce back.
Acrylic yarns work well for ear warmers when it’s just cool out and not too windy. To help protect against the wind, I would recommend an animal fiber. The more animal fiber within the yarn, the better it will protect against the wind and the warmer it will be. My favorite yarns for ear warmers are wool blends, like Lion Brand Wool Ease and Berroco Vintage. If you are allergic to wool, but looking for a different animal fiber, try Alpaca.
Awesome Lightweight Ear Warmer Yarn Ideas:
- Cotton Blends for Warm Weather: Lion Brand Coboo, Berroco Modern Cotton DK
- Cozy Wool & Wool Blends: Jody Long Ciao, Berroco Vintage DK
- Cozy Non-Wool Alpaca Blends: Juniper Moon Herriot, Lion Brand Baby Alpaca, Lion Brand Feels Like Alpaca
- Acrylic Yarn: WeCrochet Brava Sport
Awesome Worsted Weight Ear Warmer Yarn Ideas:
- Cotton Blend for Warm Weather: Berroco Modern Cotton
- Cozy Wool & Wool Blends: Araucania Huasco Aran Kettle Dyed Yarn, Lion Brand Wool Ease, Berroco Vintage, WeCrochet Swish
- Cozy Non-Wool Alpaca Blends: Ella Rae Cozy Alpaca
- Acrylic Yarns: Lion Brand Jeans, Lion Brand Heartland, WeCrochet Brava
Awesome Chunky Weight Ear Warmer Yarn Ideas:
- Cozy Wool & Wool Blends: Moonshine Bulky, Berroco Vintage Chunky, Araucania Huasco Kettle Dyed Chunky Yarn
- Cozy Non-Wool Alpaca Blends: Ella Rae Cozy Chunky Alpaca
- Acrylic Yarns: Lion Brand Impressions Yarn (Beware of knots though!)
- Note: If you don’t have a chunky yarn in your stash, you can hold 2 – 3 strands together of a Lightweight #3 or Worsted Weight #4 Yarn.
Feel free to use your favorite yarn out of your stash!
17 Free Ear Warmer Crochet Patterns:
{The following ear warmer crochet patterns are available in multiple weights of yarn.}

Lightweight Little Pebbles Ear Warmer | Worsted Weight Little Pebbles Earwarmer

Lightweight Haylee Ear Warmer | Worsted Weight Haylee Earwarmer | Chunky Weight Haylee Ear Warmer
{The following ear warmer crochet patterns are in worsted weight #4 yarn.}


Twisted Through the Window Earwarmer
{The following washcloth patterns are in super bulky weight #6 yarn.}


Would love to have you join our Yarn Crafts & Coffee Community group on Facebook to share your creations, and see what others are up to