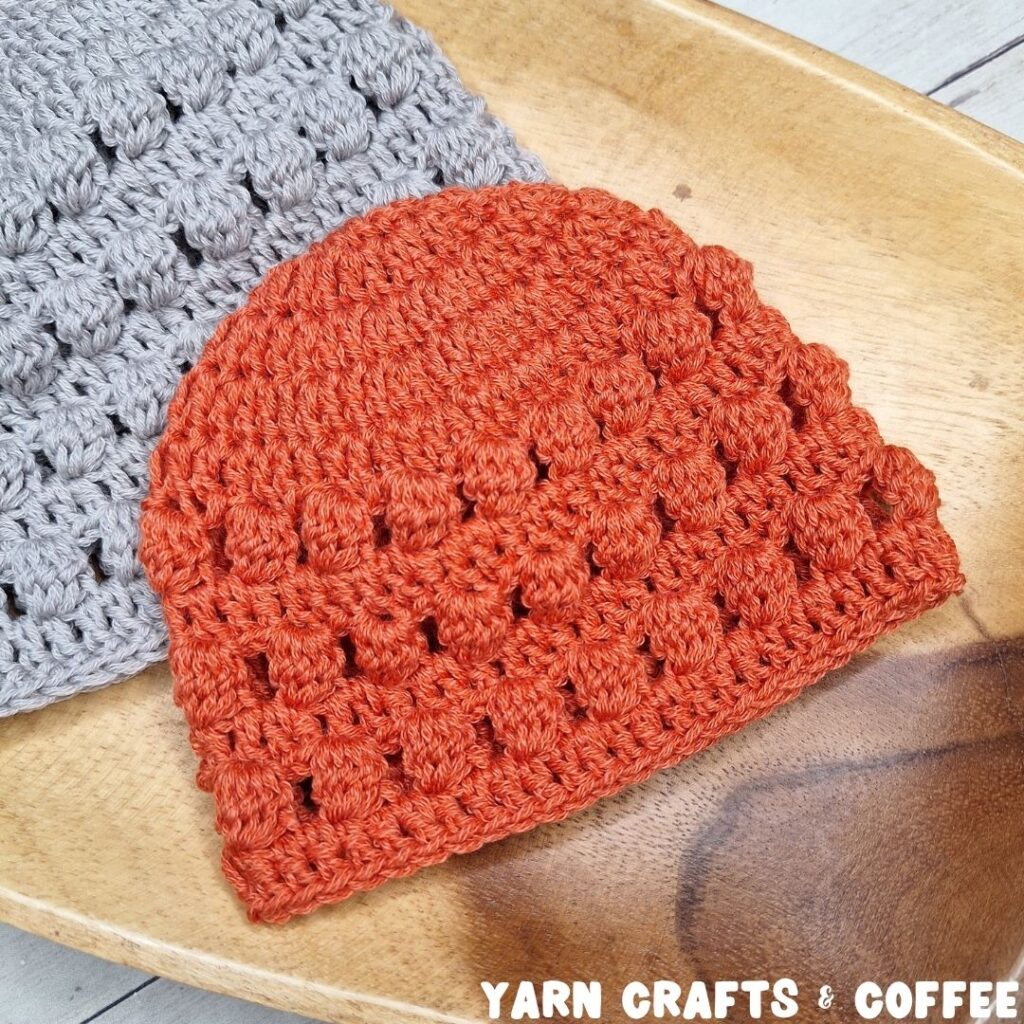
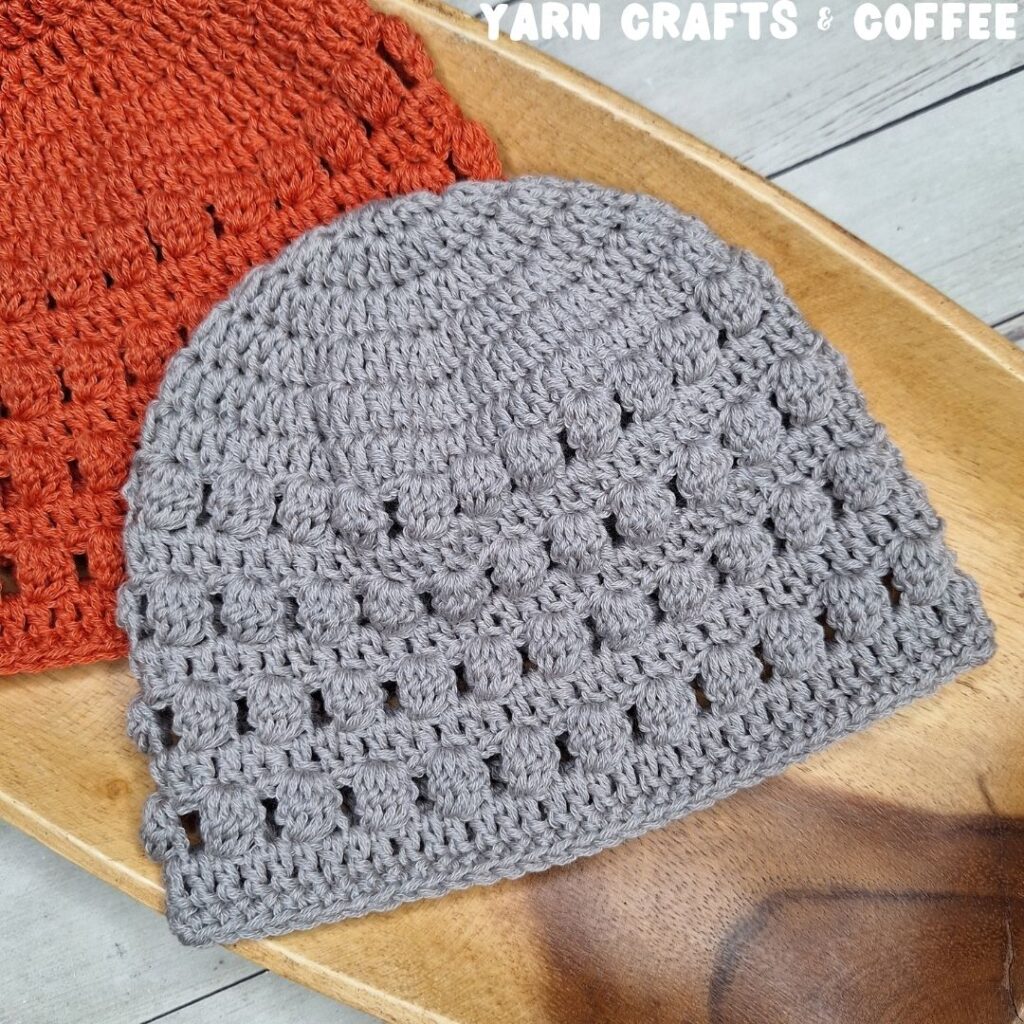
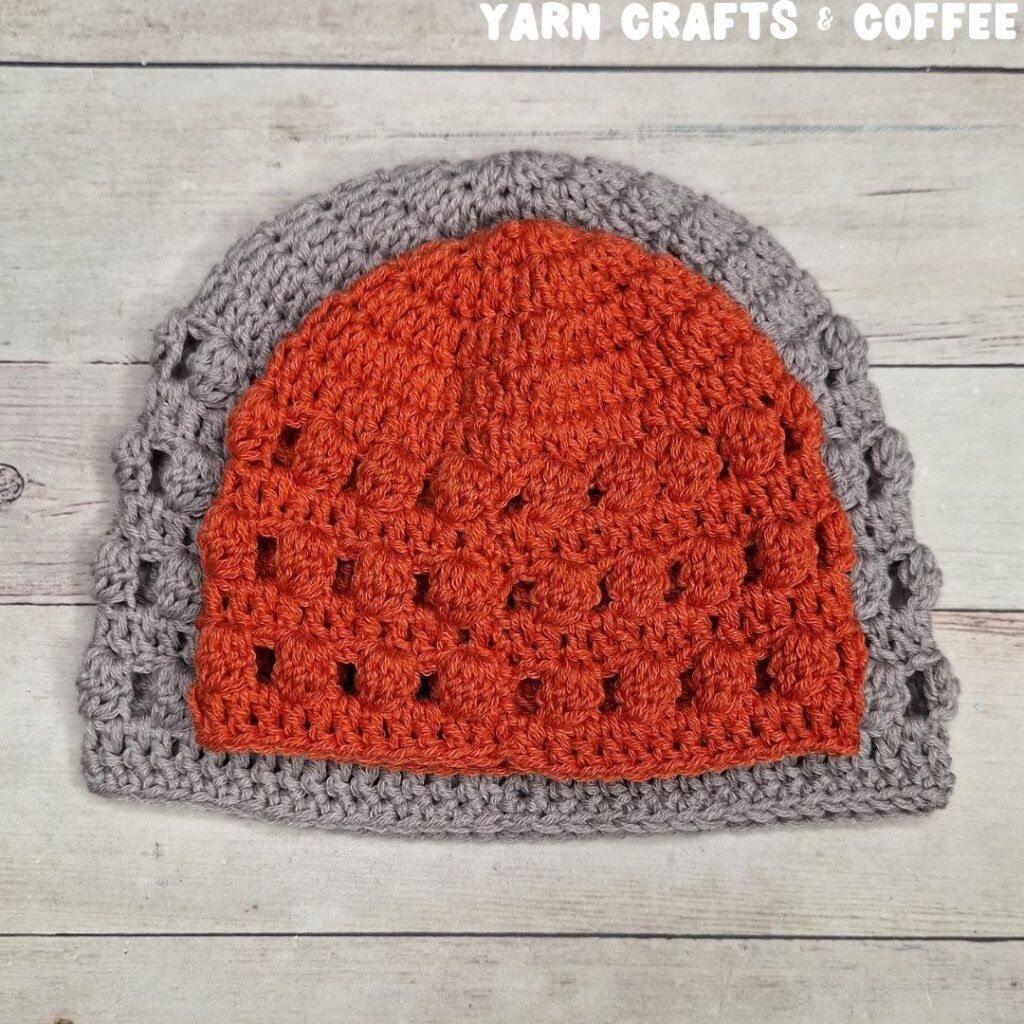
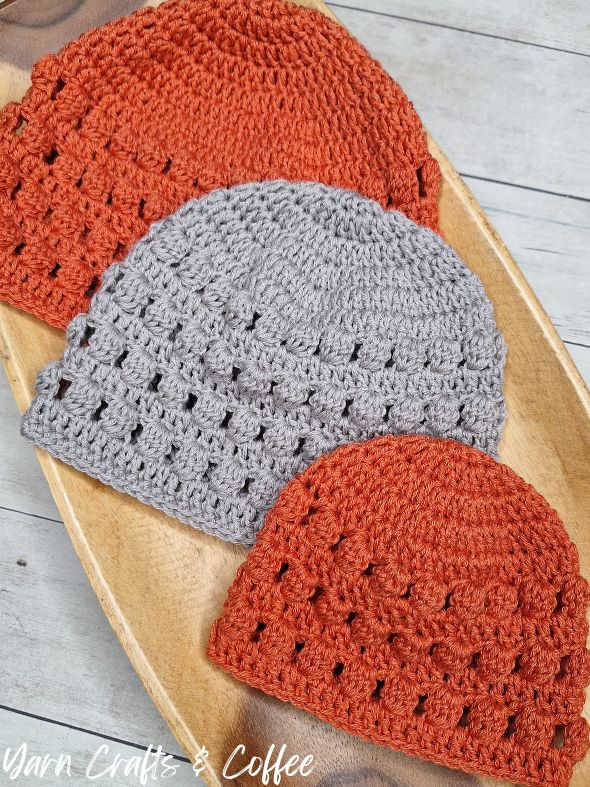
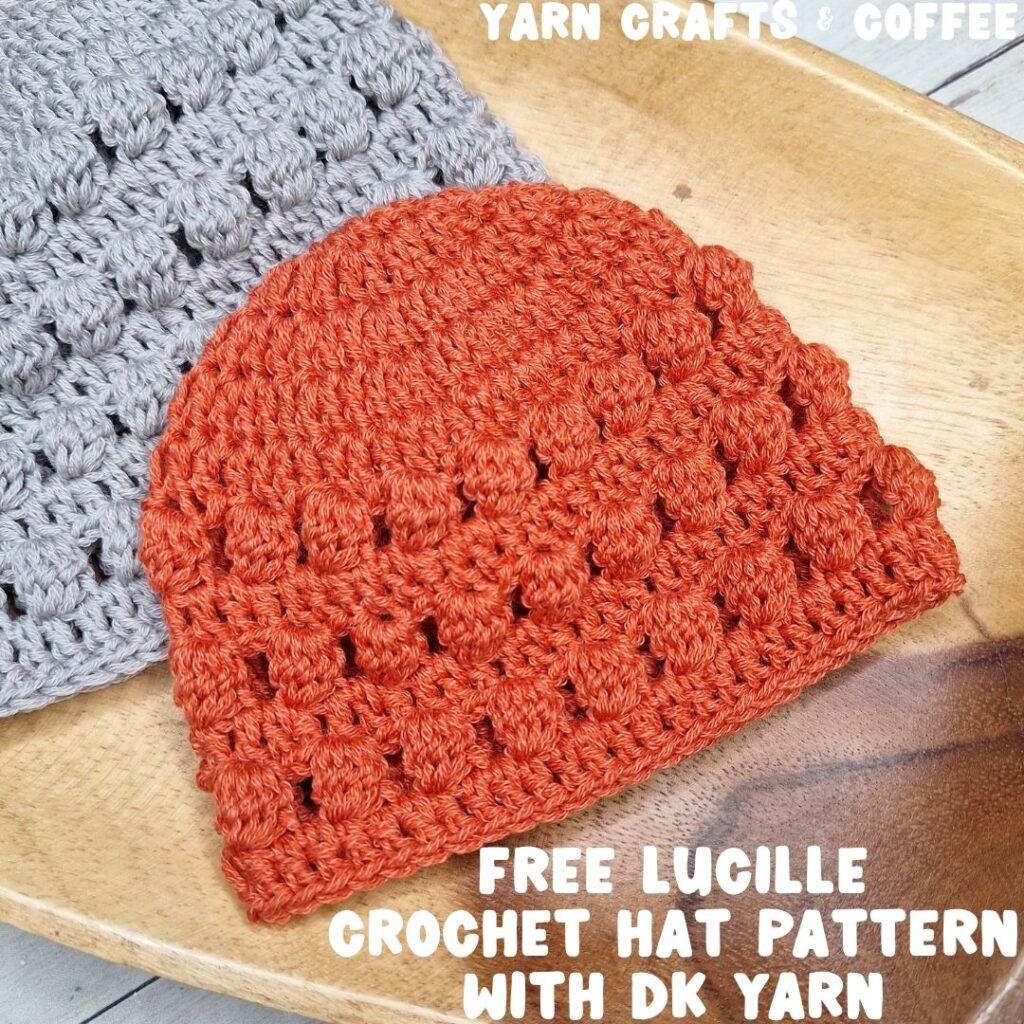
Learn how to crochet a cute beanie featuring a crochet lace pattern created by alternating a round of simple double crochet and a round of a crochet cluster stitch with this free crochet pattern. This beanie hat pattern is available in 8 sizes from newborn to adult large and worked in your favorite lightweight yarn.
This post contains affiliate links. If you make a purchase by clicking on them, I make a small commission at no extra cost to you. I only recommend products I love and hope you’ll love them too! Click here to find out about the different affiliate programs I am apart of. This post also contains shop links to my yarn shop and craft store, Yarn Crafts & Coffee. You can shop online or in person in Melbourne, Florida.
Find the free crochet pattern instructions below, or purchase a printer-friendly, ad-free PDF on Ravelry by clicking here.
In a hurry? Pin this for later when you have more time.
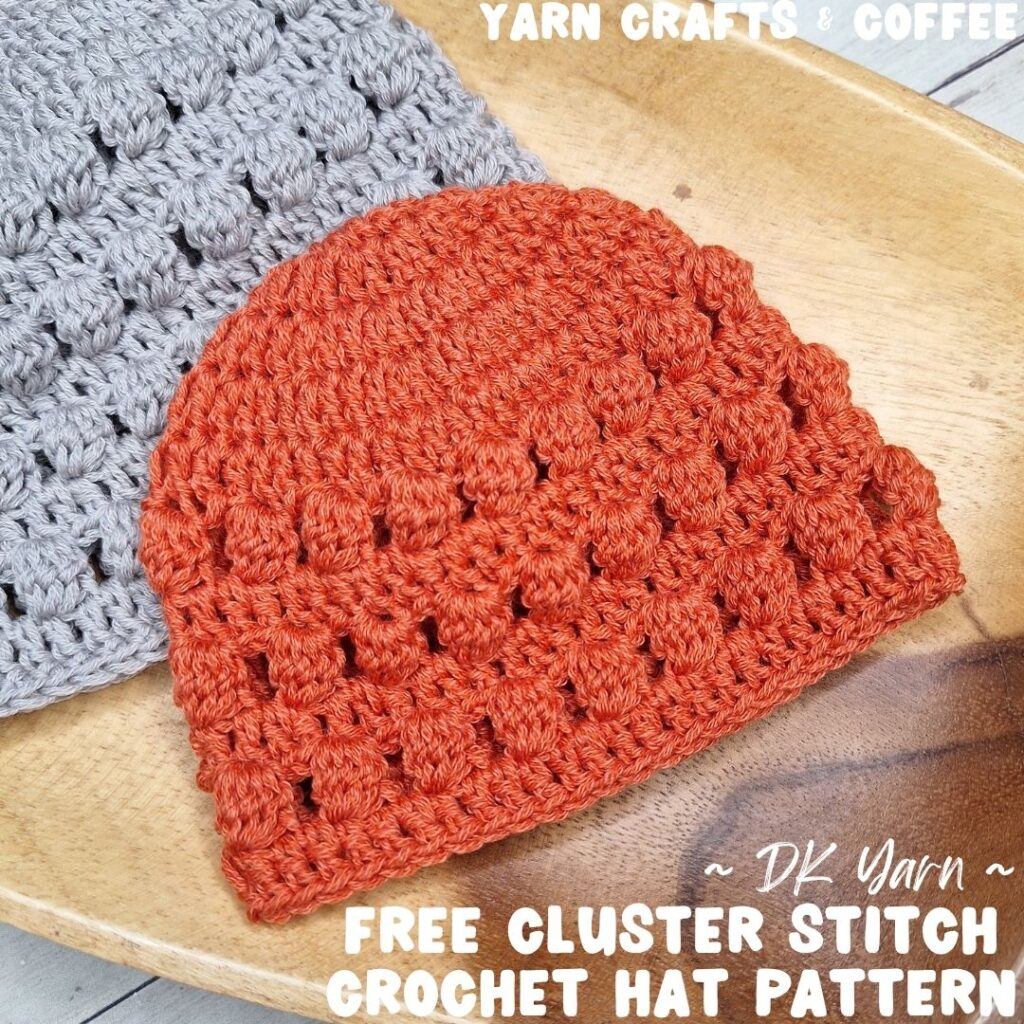
I am honored to be returning to participate in this year’s Crochet Cancer Challenge hosted by Christine from Sweet Potato 3 with a beanie featuring a crochet lace pattern created by alternating a round of simple double crochet and a round of a crochet cluster stitch. I think this one is so fun, cute and a breathable choice for wearing anytime. I’ve chosen the color light orange for Leukemia this year.
The Crochet Cancer Challenge is a beautiful charity event where each day in the month of October, you can download a different free crochet pattern, and each download = 1 pledge for making and donating a hat using that pattern. Many of the beanies/hats are available for the entire month of October so I’ve you’ve missed any, you still have time on many of them to download the PDF – all the details found on the Sweet Potato 3 blog.
In Previous Crochet Cancer Challenges, I shared these Free Crochet Beanie Patterns:
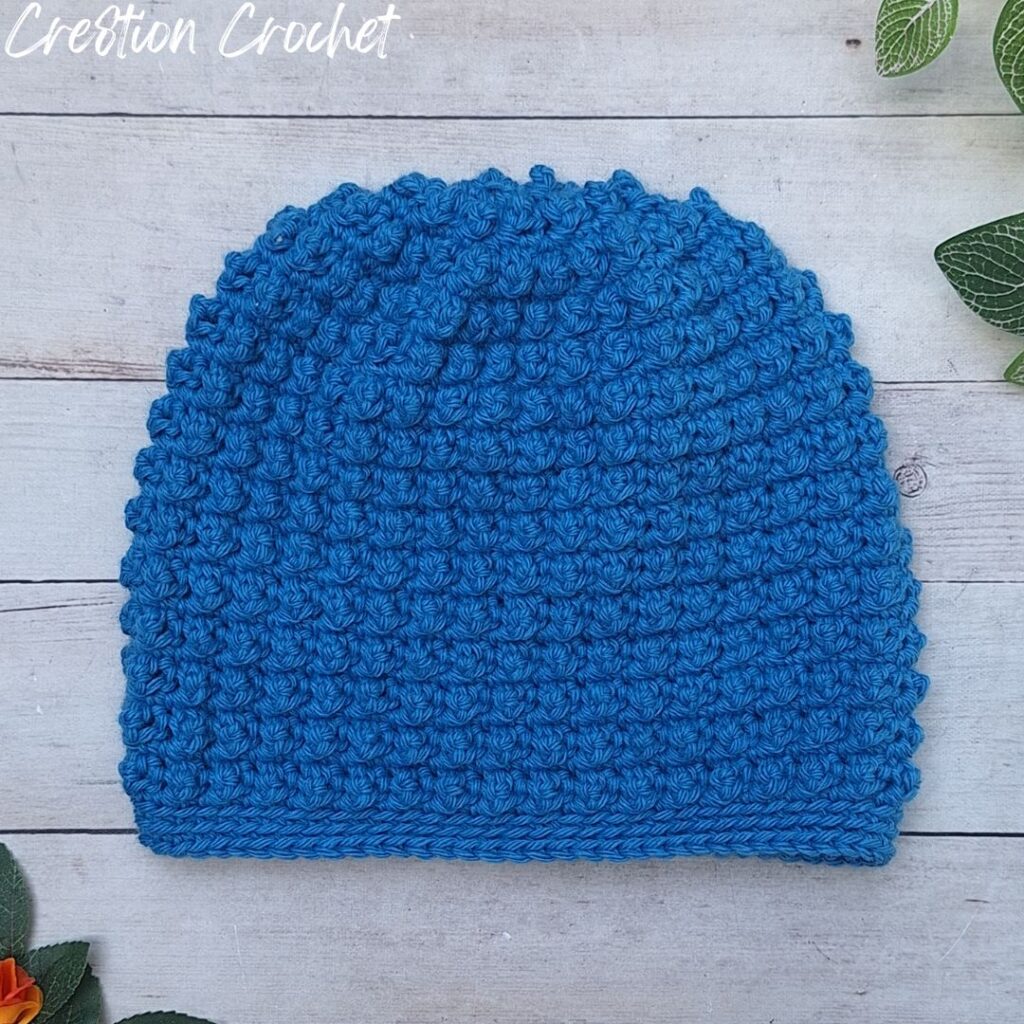
Little Pebbles Beanie (over on my sister blog, Cre8tion Crochet) in honor of Prostate Cancer.

Octavia Beanie (over on my sister blog, Cre8tion Crochet) in honor of Leiomyosarcoma, or LMS.

Lightweight Grace Tinley Beanie (over on my sister blog, Cre8tion Crochet) in honor of Pancreatic Cancer.

Striped Dylan Claire Beanie (over on my sister blog, EyeLoveKnots) in honor of Retinoblastoma and Childhood Cancer.
Please visit with Christine at Sweet Potato 3 to get all the details for this Crochet Cancer Challenge, download free printable tags for your beanies, and get the schedule for each free pattern including her beautiful Woven with Hope Beanie.
Cluster Stitch Crochet Patterns:
Lucille is one of my crochet series that features a fun lacy stitch pattern made of cluster stitches that alternatives with a solid stripe of (US) double crochets for a both a smooth and textured fabric that is great for so many different crocheted projects. These projects have a simple two row repeat making them great projects to pair with watching your favorite TV show or movie.
Find more Lucille accessory and home decor crochet patterns on EyeLoveKnots, and Lucille accessory and wearables crochet patterns here on Yarn Crafts & Coffee.
You May Also Like:
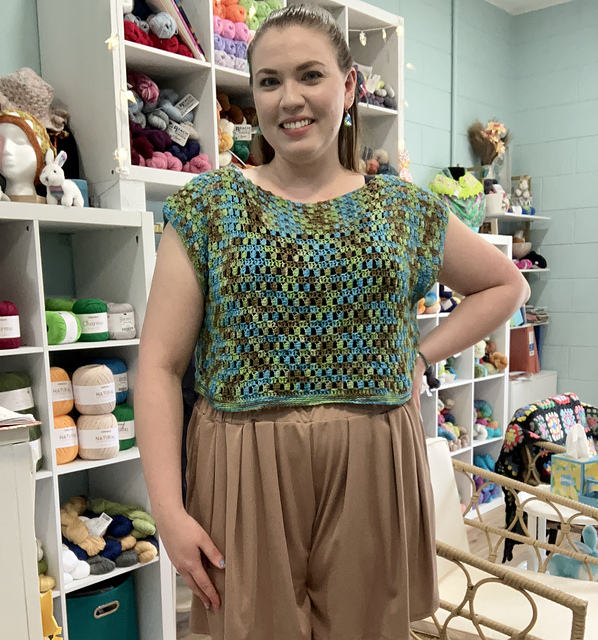
Lucille Top with Fingering Weight Yarn – Photo courtesy of Crochet Aweigh – on my sister blog, EyeLoveKnots

Lucille Cardigan with DK Yarn on my sister blog, EyeLoveKnots
Ad-Free Printer Friendly PDF:

Yarn Crafts & Coffee newsletter subscribers get access to Exclusive Subscriber Content, like the free PDF of this pattern via the Free File Library. The library is password protected so sign up for my newsletter and you’ll receive a Welcome email containing this month’s password, or if you are already a blog subscriber, reference your latest newsletter for this month’s password. From the library, you’ll be able to access the PDFs via Google Drive – you do not need to have a Google Drive account to view and download the PDF.
For a Limited Time…
Through 10/31/25 at 11:59pm EST, you can grab a free copy of the PDF for the Lightweight Lucille Beanie on Ravelry using the code found inside Sweet Potato 3’s 2026 Crochet Cancer Challenge post. We both earn our income from the number of pageviews our blogs see, so please do not share the code, but instead share the link to this post or the Crochet Cancer Challenge post so others can find it. Thank you!
After 10/31/25 or for non-subscribers, if you would like a PDF version of this post, you may get one through either my Etsy Shop or Ravelry Shop for a small fee. This fee is to compensate for the views lost when you no longer need to return to the blog to for the information, as you will have your own copy.
Materials:
- DK/Lightweight #3 Yarn
- **4.5mm Crochet Hook (4.25mm can also work, check gauge)
- Tape Measure (gauge is essential)
- Tapestry Needle
- Scissors
Grams/Yardage by Size:
- Newborn: 87 Yards (29 Grams)
- 0-3 Months: 96 Yards (33 Grams)
- 3-6 Months: 128 Yards (43 Grams)
- 6-12 Months: 147 Yards (50 Grams)
- Toddler: 182 Yards (61 Grams)
- Child: 199 Yards (66 Grams)
- Adult Small: 215 Yards (72 Grams)
- Adult Large: 279 Yards (94 Grams)
Yarn Talk:
I used Lion Brand Cottino in the Poppy and Dove colorways. This is a lovely blend of 50% superwash merino wool and 50% cotton, and the blend is precisely why I picked it for this beanie as it was designed for a crochet cancer challenge. The yarn does have a neat twist and sheen to it leading to a textured look visually keeping it’s soft and smooth physical feel, but it is extremely splitty from one end. If you experience splitting with it, go to the other tail end to work from. For me, working from the center pull was incredibly splitty, but working from the outside pull was perfectly fine.
**Another note about this yarn, unlike almost all other yarns, it does scrunch up 1/4” when it relaxes, after being worked up. I left my samples for several days before checking so I’m not sure if it’s just overnight that it needs to fully relax or more, but if you are going to work with the Cottino yarn for your beanie, use an H8/5mm crochet hook and follow the same written instructions. Initially, your crown and finished beanie will come out 1/4” larger than written, but when it relaxes, it will be the perfect size – if you don’t, the finished beanie will be too small, both in circumference and length. For all other yarns, including 100% wool or acrylic, an acrylic blend or a cotton blend, use the 4.5mm hook.
Recently, I’ve learned from my friend Krissy of Krissy’s Over the Mountain Crochet that as a beanie for cancer patients, the best yarn for a sensitive head is going to be a bamboo blend, Lion Brand Coboo or Mirasol’s Amaru. Some can tolerate 100% acrylic or wool, but not all can. With this said, if you’ll be donating your beanie, I recommend looking up the requirements from the organization. Some say not to use wool yarns. Some say not to use Red Heart Super Saver (though I think this is a great yarn that really softens nicely after washing, and wears and washes so well). Some request the beanies to be washed prior to donating. Each has it’s own set of guidelines so you’ll want to check with the organization first.
As a cold weather beanie, animal fibers are better for keeping warm against the wind, and while alpaca works great, my go-to is always a 100% superwash merino wool, like WeCrochet Swish DK Yarn or Jody Long Ciao, or a wool and acrylic blend, like Lion Brand Wool Ease DK or Ella Rae Cozy Soft. All of these that I’ve mentioned hold up well to wear and tear and machine washing and drying. Acrylic yarns do okay in cool weather as long as it’s not that windy, otherwise, the wind goes right through them. Then again… we also have a lacey stitch pattern so you may consider also wearing an ear warmer to keep your ears warm.
If you’re looking for an acrylic yarn option, Jody Long Bubbakins is a great option with lots of colors available.
Tools & Notions:
We have lots of great crochet hooks in our Yarn Crafts and Coffee Yarn Shop. The most popular, and preferred by Candace and Emily, are the Clover Amour Crochet Hooks with the soft handles and smooth metal hook. Alexandra prefers metal crochet hooks with large, ergonomic clay handles and just loves the fun designs from SiennasBowtique and BronzeShepherdStudio! If your preference is wood, the LYKKE brand are lovely, smooth and sturdy.
A tape measure is an essential tool in a multitude of crafts, including crocheting, knitting and needlepoint to name a few, especially if you are cutting material to finish a project or trying to meet gauge.
Tapestry Needles with the blunt, round end are essential for sewing and finishing in crocheting and knitting. The blunt, rounded end allows the needle to pass easily through the fabric created by yarn without snagging (or getting your fingers) in the process. Aside from the more common Straight Tapestry Needle, a Bent Tip Tapestry Needle makes weaving, grafting and sewing so much easier on the hands. The long oval eye makes threading strands of yarn easier, though you may still want to use a needle threader.
Scissors are an essential tool. When I’m working on the go, I like to carry a pair of folding scissors as they fit perfectly in even the tiniest of bags. When I am working at home or have more space in my bag for a larger notions pouch, I like to use a pair of lightweight, all-purpose scissors as they are so versatile and great for a variety of things from cutting plastic canvas mesh to cutting yarn strands and trimming yarn ends after weaving in to cutting out a care tag to include with a handmade gift.
Measurements:
Please note these measurements are based on average head sizes at the 50th percentile. Example: The 3-6 Month size is a 16″ – 17″ head circumference, where 16″ is the 50th percentile for a 3 month head size and 17″ is the 50th percentile for a 6 month size.
There is some flexibility in crocheted fabric, but do try to aim towards the higher number, which is what the crown diameter is based off of. If the person you are making a beanie for is on the higher percentile for their age, you may want to size up for the head circumference, but still work towards the length for their given size.
The best way to make a beanie that will fit the recipient is to measure their head. Take your tape measure out and measure around your head just above your eyebrows. The distance around is the circumference. You will need to use this equation to figure out what size diameter you will need: Your Circumference – 2” / 3.14 (pi) = crown diameter. 2” is the amount of stretch for acrylic, wool, and similar when starting with a double crochet base.
The Newborn Size head circumference is 13 1/2″ – 14 1/2″. The crown diameter will be 4″ and the finished length will be about 5 1/8″.
The 0 – 3 Size head circumference is 14 1/2″ – 16″. The crown diameter will be 4 1/2″ and the finished length will be about 5 5/8″.
The 3 – 6 Size head circumference is 16″ – 17″. The crown diameter will be 4 3/4″ and the finished length will be about 6 3/8″.
The 6 – 12 Size head circumference is 17″ – 18 1/8″. The crown diameter will be 5″ and the finished length will be about 6 1/2″.
The Toddler Size head circumference is 18 1/8″ – 20 1/8″. The crown diameter will be 5 3/4″ and the finished length will be about 7 1/8″.
The Child Size head circumference is 20 1/8″ – 21 1/2″. The crown diameter will be 6 1/4″ and the finished length will be about 7 3/8″.
The Teen/Adult Small Size fits the average teen/woman’s size head circumference of 21 1/2″ – 22″. The crown diameter will be 6 3/8″ and the finished length will be about 8 3/8″.
The Adult Large Size head circumference is 22″ – 23″. The crown diameter will be 6 5/8″ and the finished length will either be 8 1/2″ or 9 3/8″.
Gauge (Essential):
Gauge can be taken after working 4 rounds as outlined below and/or once the diameter for the size you’re making is reached:
If you start with:
- 10 DC, then 40 stitches = 3 5/8″
- 11 DC, then 44 stitches = 3 3/4″
- 12 DC, then 48 stitches = 3 7/8″
- 13 DC, then 52 stitches = 4″
- 14 DC, then 56 stitches = 4 1/8″
Gauge it very important for beanies. If you do not meet gauge, and continue making your beanie, the finished size will either be too small or too big so make sure to check it at the end of Round 4.
If you’re measuring smaller than the given measurements, go up a crochet hook size and rework the sample. If you’re measuring larger than the given measurements, go down a crochet hook size and rework the sample. Take gauge again, and see where you are.
Abbreviations (US Terms):
- DC – Double Crochet (Photo Tutorial)
- SC – Single Crochet (Photo Tutorial)
Special Stitch:
Cluster stitches are worked from the wrong side, or back side, of the project, but will pop out on the right side, or front side. With a chain space following the cluster, it will remain more relaxed in comparison to a bobble stitch.
To Create a Cluster: work the following all into one stitch: Yarn over, insert hook into the stitch, yarn over, pull through (3 loops on hook), [yarn over, pull through two loops on hook, yarn over, insert hook into the same stitch, yarn over, pull through] (4 loops on hook), repeat […] (5 loops on hook), repeat […] (6 loops on hook), yarn over, pull through all 6 loops on the hook.
Pattern Notes:
The beginning chain 1 and 2 at the start of a round does not count as a stitch at any point in the pattern.
Slip stitch join to the first double crochet at the end of each round.
Here is what the seam looks like on the finished beanie.

I work my crown and body differently than most to help keep my seam straight, and that is that the first stitch from the first set of increases is done in the first stitch of the round, which will appear just to left of the beginning chain, then the round will be worked as normal, and the final stitch of the round will be the second stitch of the first set of increases, and it will be worked into the same stitch as the first, and appear just to the right of the beginning chain. The photo above shows where the first and last stitch are worked, and I have a photo tutorial of this technique in my How to Keep a Straight Seam post. You can work in your preferred increase method as long as we end up with the same stitches at the end of the round.
When it comes time to working the cluster stitch round, you will need to have a total number of stitches that is divisible by 3. We will increase/decrease as needed in the last round of double crochets, but if you adjust the crown, keep this in mind.
The double crochet rounds will be worked from the right side of the beanie, and the cluster stitch rounds will be worked from the wrong side of the beanie. Following this, you will not turn after joining the round until you reach the first cluster stitch round so be sure to watch for the turning instructions within the pattern.
When working into the chain space that’s before a cluster stitch, I recommend working one double crochet into the space as normal, and then one double crochet into the second chain – it’s very easy to spot.
Some rounds end after working a double crochet round, and some have an additional round of single crochet simply to reach the necessary height. If you’ll be adding the single crochet round and you have a tight tension, you may want to go up a crochet hook size for this final round only so the brim will not be too tight.
Cluster Stitch Crochet Hat Pattern:
Newborn Size:
Chain 6. Join to form a ring. Chain 2. 13 DC into the ring. Join. (13 DC)
R2: Chain 2. Work 1 DC into the 1st stitch, 2 DC in each of the next 12 DCs, and 1 DC into the last stitch. Join. (26 DC)
R3: Chain 2. Work 1 DC into the first 2 stitches, (2 DC into the next stitch, 1 DC into the next stitch) 12x, 1 DC into the last stitch. Join. (39 DC)
R4: Chain 2. Skip the 1st stitch, work 1 DC into each of the next 2 stitches, (2 DC into the next stitch, 1 DC into each of the next 2 stitches) 12x, 1 DC into the last stitch. Join. (51 DC)
Checkpoint: Stop here, and measure the diameter to ensure the finished beanie will fit correctly. You’ll want your diameter to measure 4″.
R5: Chain 2. DC into the 1st DC and each DC around. Join. (51 DC)
R6: Chain 1, turn. (Cluster into the next stitch, chain 2, skip each of the next 2 stitches) around. Join. (17 Clusters)
R7: Chain 2, turn. DC into the 1st space, then into each stitch around. (51 DC)
R8 – 11: Repeat Rounds 6 and 7.
Checkpoint: Your beanie should be measuring approximately 5 1/8″ tall.
Fasten off, and weave in the tail ends.
0-3 Months Size:
Chain 4. Join to form a ring. Chain 2. 10 DC into the ring. Join. (10 DC)
R2: Chain 2. Work 1 DC into the 1st stitch, 2 DC in each of the next 9 DCs, and 1 DC into the last stitch. Join. (20 DC)
R3: Chain 2. Work 1 DC into the first 2 stitches, (2 DC into the next stitch, 1 DC into the next stitch) 9x, 1 DC into the last stitch. Join. (30 DC)
R4: Chain 2. Work 1 DC into the first 3 stitches, (2 DC into the next stitch, 1 DC into each of the next 2 stitches) 9x, 1 DC into the last stitch. Join. (40 DC)
R5: Chain 2 (count as a DC for this round only). Work 1 DC into the first 4 stitches, (2 DC into the next stitch, 1 DC into each of the next 3 stitches) 9x, 1 DC into the last stitch. Join to the beginning chain 2 for this round only. (51 DC)
Checkpoint: Stop here, and measure the diameter to ensure the finished beanie will fit correctly. You’ll want your diameter to measure 4 1/2″.
R6: Chain 2. DC into the 1st DC and each DC around. Join. (51 DC)
R7: Chain 1, turn. (Cluster into the next stitch, chain 2, skip each of the next 2 stitches) around. Join. (17 Clusters)
R8: Chain 2, turn. DC into the 1st space, then into each stitch around. (51 DC)
R9 – 12: Repeat Rounds 7 and 8.
R13: Chain 1. SC into the 1st DC and each DC around. Join to the 1st SC. (51 SC)
Checkpoint: Your beanie should be measuring approximately 5 5/8″ tall.
Fasten off, and weave in the tail ends.
3-6 Months Size:
Chain 5. Join to form a ring. Chain 2. 12 DC into the ring. Join. (12 DC)
R2: Chain 2. Work 1 DC into the 1st stitch, 2 DC in each of the next 11 DCs, and 1 DC into the last stitch. Join. (24 DC)
R3: Chain 2. Work 1 DC into the first 2 stitches, (2 DC into the next stitch, 1 DC into the next stitch) 11x, 1 DC into the last stitch. Join. (36 DC)
R4: Chain 2. Work 1 DC into the first 3 stitches, (2 DC into the next stitch, 1 DC into each of the next 2 stitches) 11x, 1 DC into the last stitch. Join. (48 DC)
R5: Chain 2. Work 1 DC into the first 4 stitches, (2 DC into the next stitch, 1 DC into each of the next 3 stitches) 11x, 1 DC into the last stitch. Join. (60 DC)
Checkpoint: Stop here, and measure the diameter to ensure the finished beanie will fit correctly. You’ll want your diameter to measure 4 3/4″.
R6: Chain 2. DC into the 1st DC and each DC around. Join. (60 DC)
R7: Chain 1, turn. (Cluster into the next stitch, chain 2, skip each of the next 2 stitches) around. Join. (20 Clusters)
R8: Chain 2, turn. DC into the 1st space, then into each stitch around. (60 DC)
R9 – 14: Repeat Rounds 7 and 8.
Checkpoint: Your beanie should be measuring approximately 6 3/8″ tall.
Fasten off, and weave in the tail ends.
6-12 Months Size:
Chain 6. Join to form a ring. Chain 2. 14 DC into the ring. Join. (14 DC)
R2: Chain 2. Work 1 DC into the 1st stitch, 2 DC in each of the next 13 DCs, and 1 DC into the last stitch. Join. (28 DC)
R3: Chain 2. Work 1 DC into the first 2 stitches, (2 DC into the next stitch, 1 DC into the next stitch) 13x, 1 DC into the last stitch. Join. (42 DC)
R4: Chain 2. Work 1 DC into the first 3 stitches, (2 DC into the next stitch, 1 DC into each of the next 2 stitches) 13x, 1 DC into the last stitch. Join. (56 DC)
R5: Chain 2. Skip the 1st stitch, work 1 DC into each of the next 3 stitches, (2 DC into the next stitch, 1 DC into each of the next 3 stitches) 13x, 1 DC into the last stitch. Join. (69 DC)
Checkpoint: Stop here, and measure the diameter to ensure the finished beanie will fit correctly. You’ll want your diameter to measure 5″.
R6: Chain 2. DC into the 1st DC and each DC around. Join. (69 DC)
R7: Chain 1, turn. (Cluster into the next stitch, chain 2, skip each of the next 2 stitches) around. Join. (13 Clusters)
R8: Chain 2, turn. DC into the 1st space, then into each stitch around. (69 DC)
R9 – 14: Repeat Rounds 7 and 8.
Checkpoint: Your beanie should be measuring approximately 6 1/2″ tall.
Fasten off, and weave in the tail ends.
Toddler Size:
Chain 6. Join to form a ring. Chain 2. 13 DC into the ring. Join. (13 DC)
R2: Chain 2. Work 1 DC into the 1st stitch, 2 DC in each of the next 12 DCs, and 1 DC into the last stitch. Join. (26 DC)
R3: Chain 2. Work 1 DC into the first 2 stitches, (2 DC into the next stitch, 1 DC into the next stitch) 12x, 1 DC into the last stitch. Join. (39 DC)
R4: Chain 2. Work 1 DC into the first 3 stitches, (2 DC into the next stitch, 1 DC into each of the next 2 stitches) 12x, 1 DC into the last stitch. Join. (52 DC)
Checkpoint: Stop here, and measure the diameter to ensure the finished beanie will fit correctly. You’ll want your diameter to measure 4″.
R5: Chain 2. Work 1 DC into the first 4 stitches, (2 DC into the next stitch, 1 DC into each of the next 3 stitches) 12x, 1 DC into the last stitch. Join. (65 DC)
R6: Chain 2. Work 1 DC into the first 5 stitches, (2 DC into the next stitch, 1 DC into each of the next 4 stitches) 12x, 1 DC into the last stitch. Join. (78 DC)
Checkpoint: Stop here, and measure the diameter to double check the crown has increased to the correct size so the finished beanie will fit correctly. You’ll want your diameter to measure 5 3/4″.
R7: Chain 2. DC into the 1st DC and each DC around. Join. (78 DC)
R8: Chain 1, turn. (Cluster into the next stitch, chain 2, skip each of the next 2 stitches) around. Join. (26 Clusters)
R9: Chain 2, turn. DC into the 1st space, then into each stitch around. (78 DC)
R10 – 15: Repeat Rounds 8 and 9.
R16: Chain 1. SC into the 1st DC and each DC around. Join to the 1st SC. (78 SC)
Checkpoint: Your beanie should be measuring approximately 7 1/8″ tall.
Fasten off, and weave in the tail ends.
Child Size:
Chain 4. Join to form a ring. Chain 2. 10 DC into the ring. Join. (10 DC)
R2: Chain 2. Work 1 DC into the 1st stitch, 2 DC in each of the next 9 DCs, and 1 DC into the last stitch. Join. (20 DC)
R3: Chain 2. Work 1 DC into the first 2 stitches, (2 DC into the next stitch, 1 DC into the next stitch) 9x, 1 DC into the last stitch. Join. (30 DC)
R4: Chain 2. Work 1 DC into the first 3 stitches, (2 DC into the next stitch, 1 DC into each of the next 2 stitches) 9x, 1 DC into the last stitch. Join. (40 DC)
R5: Chain 2. Work 1 DC into the first 4 stitches, (2 DC into the next stitch, 1 DC into each of the next 3 stitches) 9x, 1 DC into the last stitch. Join. (50 DC)
Checkpoint: Stop here, and measure the diameter to ensure the finished beanie will fit correctly. You’ll want your diameter to measure 4 1/2″.
R6: Chain 2. Work 1 DC into the first 5 stitches, (2 DC into the next stitch, 1 DC into each of the next 4 stitches) 9x, 1 DC into the last stitch. Join. (60 DC)
R7: Chain 2. Skip the 1st stitch, work 1 DC into each of the next 5 stitches, (2 DC into the next stitch, 1 DC into each of the next 5 stitches) 9x, 1 DC into the last stitch. Join. (69 DC)
Checkpoint: Stop here, and measure the diameter to double check the crown has increased to the correct size so the finished beanie will fit correctly. You’ll want your diameter to measure 6 1/4″.
R8: Chain 2. DC into the 1st DC and each DC around. Join. (69 DC)
R9: Chain 1, turn. (Cluster into the next stitch, chain 2, skip each of the next 2 stitches) around. Join. (13 Clusters)
R10: Chain 2, turn. DC into the 1st space, then into each stitch around. (69 DC)
R11 – 16: Repeat Rounds 9 and 10.
R17: Chain 1. SC into the 1st DC and each DC around. Join to the 1st SC. (69 SC)
Checkpoint: Your beanie should be measuring approximately 7 3/8″ tall.
Fasten off, and weave in the tail ends.
Teen/Adult Small Size:
Chain 5. Join to form a ring. Chain 2. 11 DC into the ring. Join. (11 DC)
R2: Chain 2. Work 1 DC into the 1st stitch, 2 DC in each of the next 10 DCs, and 1 DC into the last stitch. Join. (22 DC)
R3: Chain 2. Work 1 DC into the first 2 stitches, (2 DC into the next stitch, 1 DC into the next stitch) 10x, 1 DC into the last stitch. Join. (33 DC)
R4: Chain 2. Work 1 DC into the first 3 stitches, (2 DC into the next stitch, 1 DC into each of the next 2 stitches) 10x, 1 DC into the last stitch. Join. (44 DC)
Checkpoint: Stop here, and measure the diameter to ensure the finished beanie will fit correctly. You’ll want your diameter to measure 3 3/4″.
R5: Chain 2. Work 1 DC into the first 4 stitches, (2 DC into the next stitch, 1 DC into each of the next 3 stitches) 10x, 1 DC into the last stitch. Join. (55 DC)
R6: Chain 2. Work 1 DC into the first 5 stitches, (2 DC into the next stitch, 1 DC into each of the next 4 stitches) 10x, 1 DC into the last stitch. Join. (66 DC)
R7: Chain 2 (count as a DC for this round only). Work 1 DC into the first 6 stitches, (2 DC into the next stitch, 1 DC into each of the next 5 stitches) 10x, 1 DC into the last stitch. Join to the beginning chain 2 for this round only. (78 DC)
Checkpoint: Stop here, and measure the diameter to double check the crown has increased to the correct size so the finished beanie will fit correctly. You’ll want your diameter to measure 6 3/8″.
R8: Chain 2. DC into the 1st DC and each DC around. Join. (78 DC)
R9: Chain 1, turn. (Cluster into the next stitch, chain 2, skip each of the next 2 stitches) around. Join. (26 Clusters)
R10: Chain 2, turn. DC into the 1st space, then into each stitch around. (78 DC)
R11 – 18: Repeat Rounds 9 and 10.
R19: Chain 1. SC into the 1st DC and each DC around. Join to the 1st SC. (78 SC)
Checkpoint: Your beanie should be measuring approximately 8 3/8″ tall.
Fasten off, and weave in the tail ends.
Adult Large Size:
Chain 6. Join to form a ring. Chain 2. 13 DC into the ring. Join. (13 DC)
R2: Chain 2. Work 1 DC into the 1st stitch, 2 DC in each of the next 12 DCs, and 1 DC into the last stitch. Join. (26 DC)
R3: Chain 2. Work 1 DC into the first 2 stitches, (2 DC into the next stitch, 1 DC into the next stitch) 12x, 1 DC into the last stitch. Join. (39 DC)
R4: Chain 2. Work 1 DC into the first 3 stitches, (2 DC into the next stitch, 1 DC into each of the next 2 stitches) 12x, 1 DC into the last stitch. Join. (52 DC)
Checkpoint: Stop here, and measure the diameter to ensure the finished beanie will fit correctly. You’ll want your diameter to measure 4″.
R5: Chain 2. Work 1 DC into the first 4 stitches, (2 DC into the next stitch, 1 DC into each of the next 3 stitches) 12x, 1 DC into the last stitch. Join. (65 DC)
R6: Chain 2. Work 1 DC into the first 5 stitches, (2 DC into the next stitch, 1 DC into each of the next 4 stitches) 12x, 1 DC into the last stitch. Join. (78 DC)
R7: Chain 2. Skip the 1st stitch, work 1 DC into each of the next 5 stitches, (2 DC into the next stitch, 1 DC into each of the next 5 stitches) 12x, 1 DC into the last stitch. Join. (90 DC)
Checkpoint: Stop here, and measure the diameter to double check the crown has increased to the correct size so the finished beanie will fit correctly. You’ll want your diameter to measure 6 5/8″.
R8: Chain 2. DC into the 1st DC and each DC around. Join. (90 DC)
R9: Chain 1, turn. (Cluster into the next stitch, chain 2, skip each of the next 2 stitches) around. Join. (30 Clusters)
R10: Chain 2, turn. DC into the 1st space, then into each stitch around. (90 DC)
The Adult Large size has the biggest range for heights, and that is that it can be either 8 1/2″ tall (like the Adult Small version) or 9 1/2″ tall, and this varies depending on the recipient.
R11 – 18 (20): Repeat Rounds 9 and 10.
R19 (21): Chain 1. SC into the 1st DC and each DC around. Join to the 1st SC. (90 SC)
Checkpoint: Your beanie should be measuring approximately 8 1/2″ or 9 3/8” tall.
Fasten off, and weave in the tail ends.
Please feel free to make and sell your own items made using this pattern, but keep in mind, this written pattern and my photos are protected by copyright. Please DO NOT claim this pattern as your own nor should you sell my pattern. DO NOT re-publish my photos as your own. DO NOT copy and paste my pattern anywhere, link to it instead so other’s can visit. Making videos providing instructions how to make my projects on any social media platform is also not permitted.
Linked Up To…
